
How I created the illustrations for Anna’s Garden.
Click on the small pictures to see larger versions
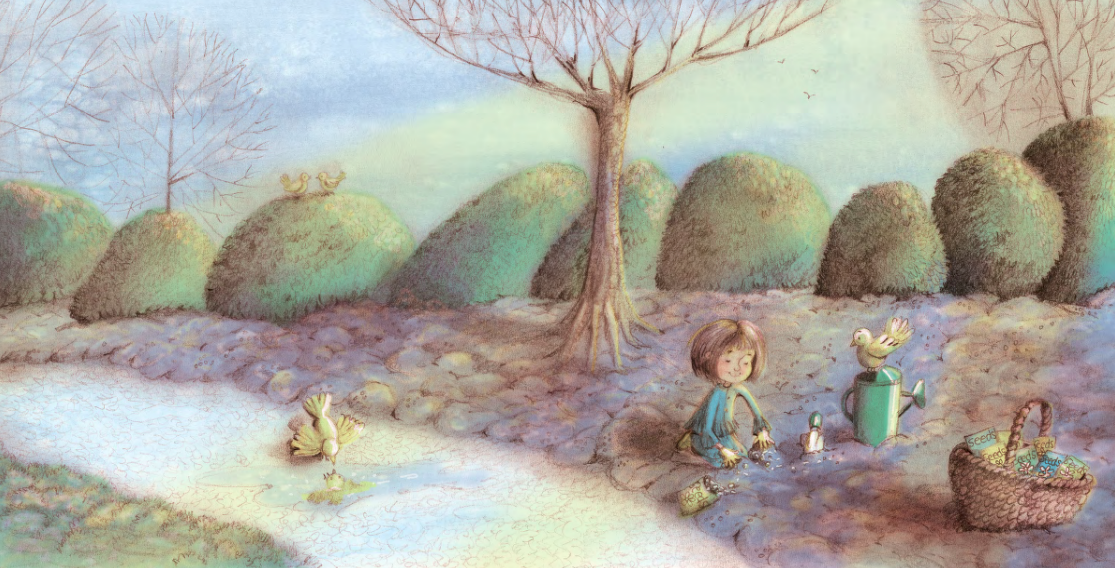
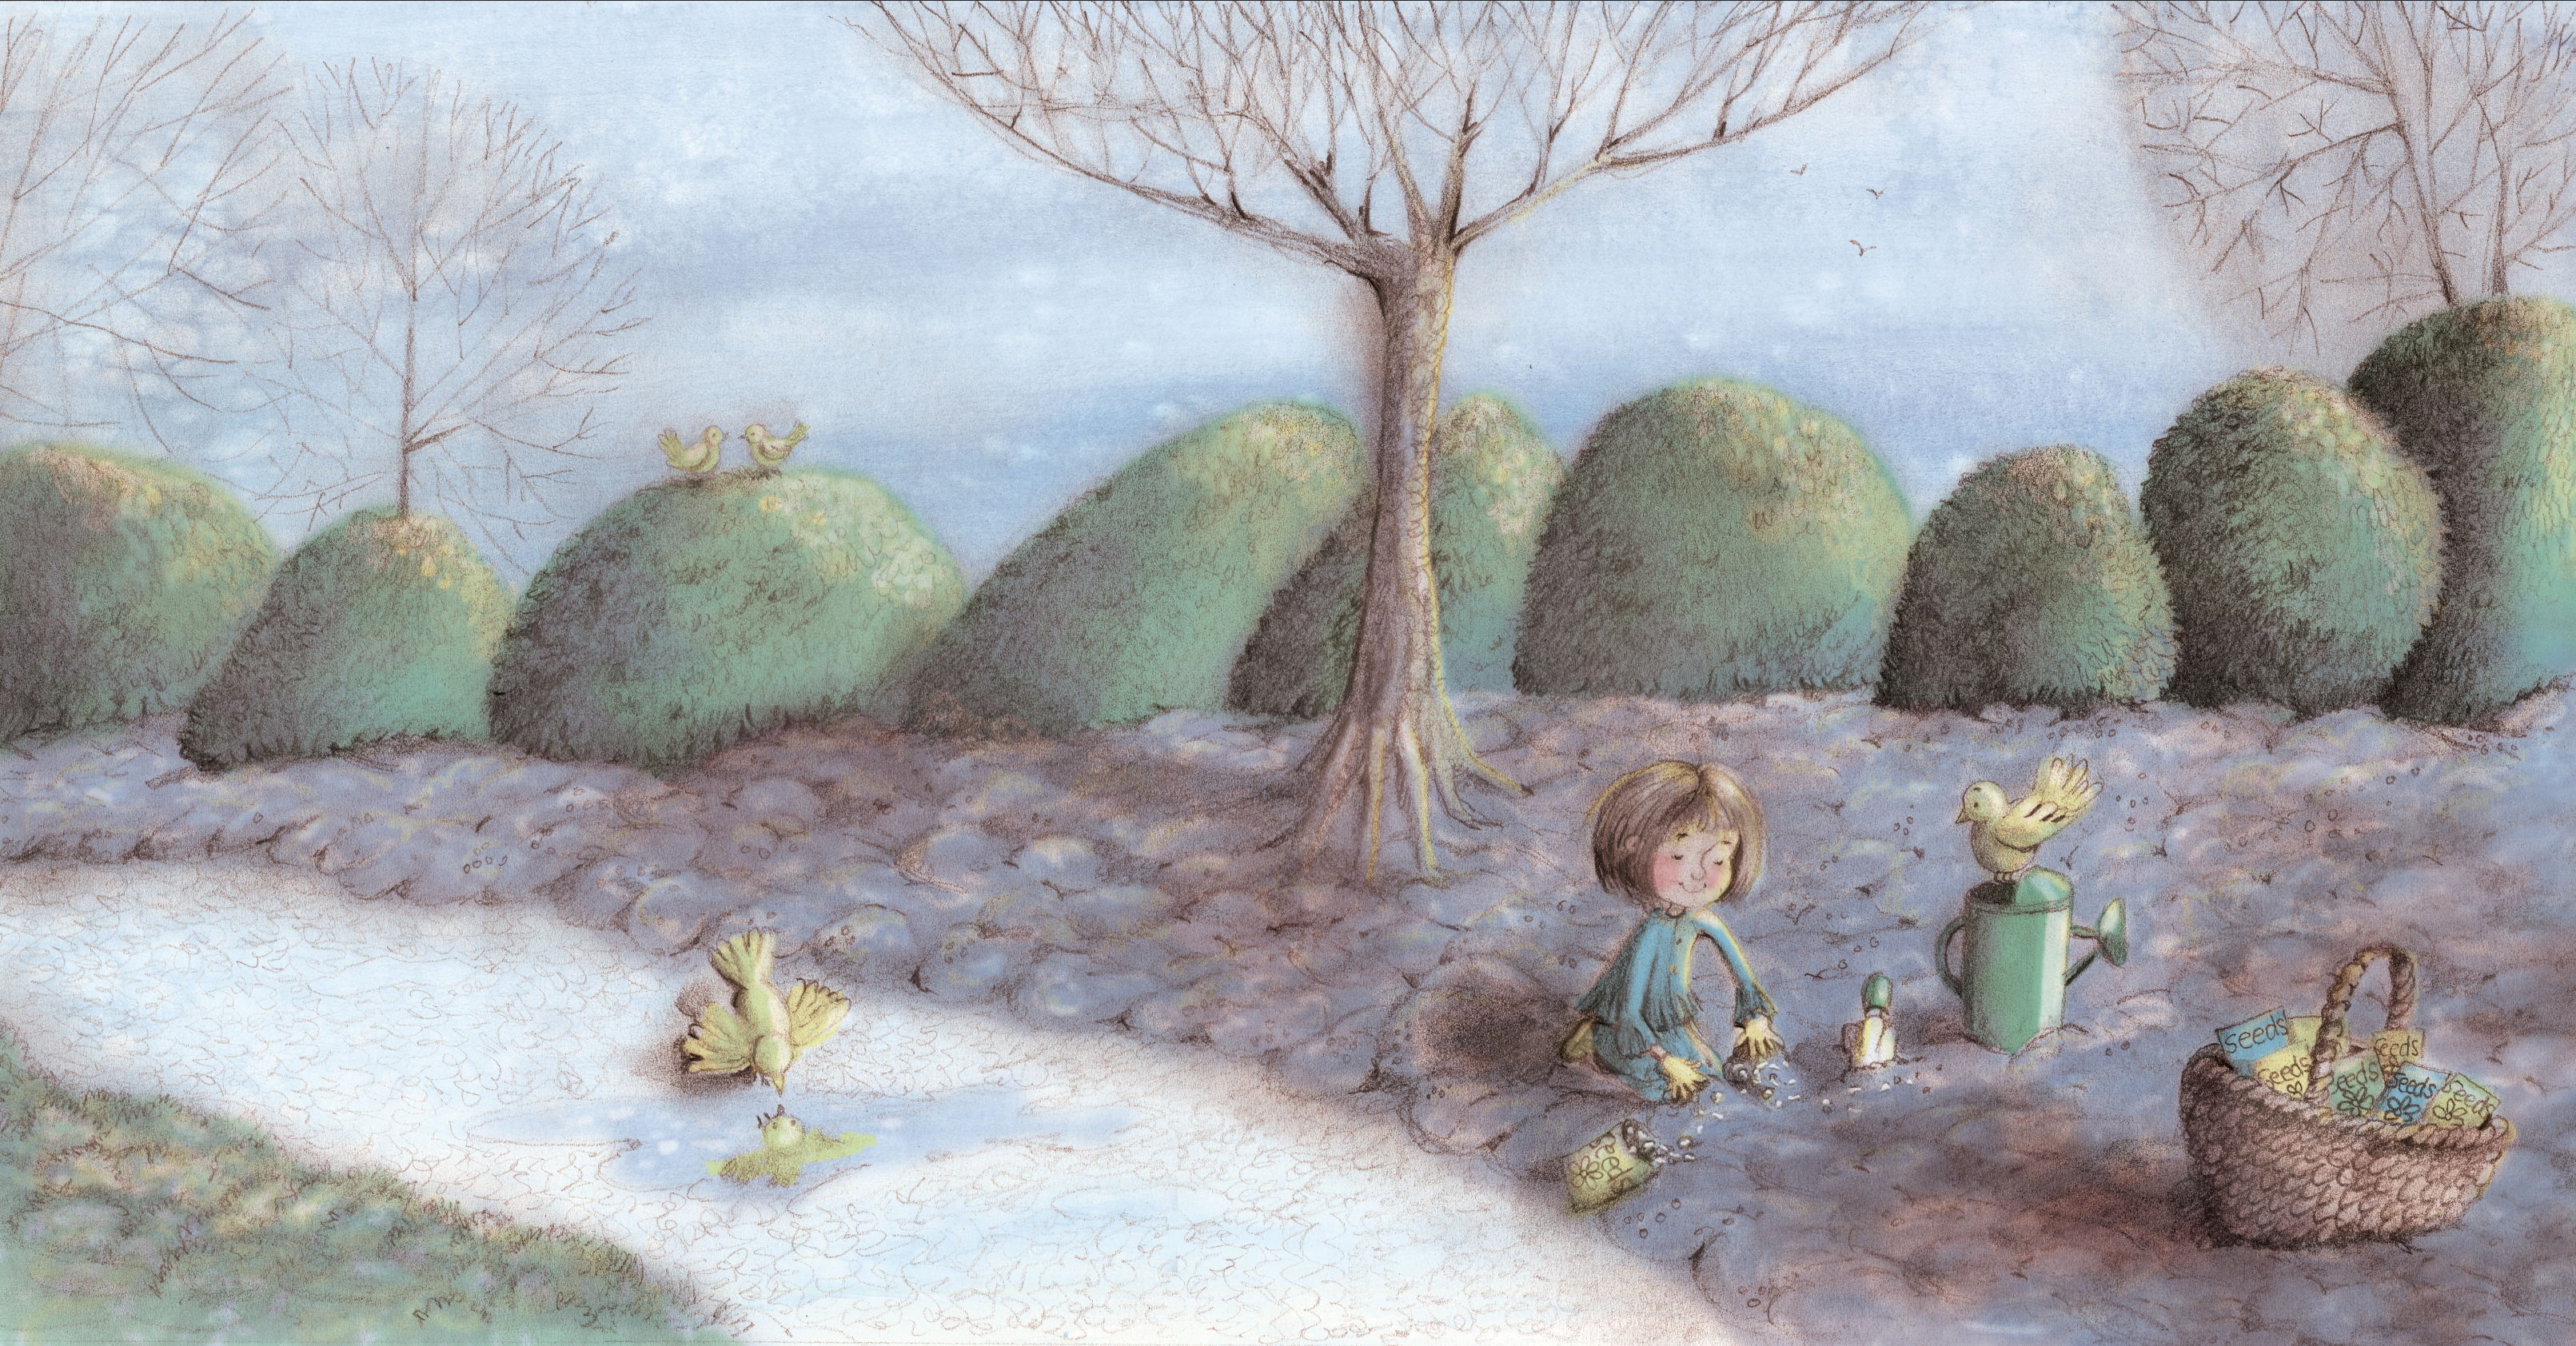
Winter time in Anna’s Garden - finished illustration
My grandson has a lovely phrase when it comes to creativity - “Nanna Sarah, tell me a story out of your brains…” Anna’s Garden did indeed come ‘out of my brains’ - the words came easily because I knew exactly what I wanted to say. But the way I wanted the illustrations to look took longer, with lots of sketching and false starts.
My illustrations are always underpinned by informed imagination (I build on what I have observed in the real world to inform the imaginary worlds my characters inhabit). Anna for example, was drawn in a very simple way, but relied on what I have observed in life to convey expressions and feelings. Observed gesture, posture etc all informed the drawings, ensuring that the illustrations captured life and movement.
Where there was going to be text on the page, I designed the layout for this first, before planning my illustrations around it, so that the text and illustrations would work together. I also considered if there were things that I wanted to add to the picture that hadn’t been mentioned in the text. In my book ‘Clara’ for example, there is a bird who has his own story going on - he features on every page, and yet the bird is never mentioned in the text…
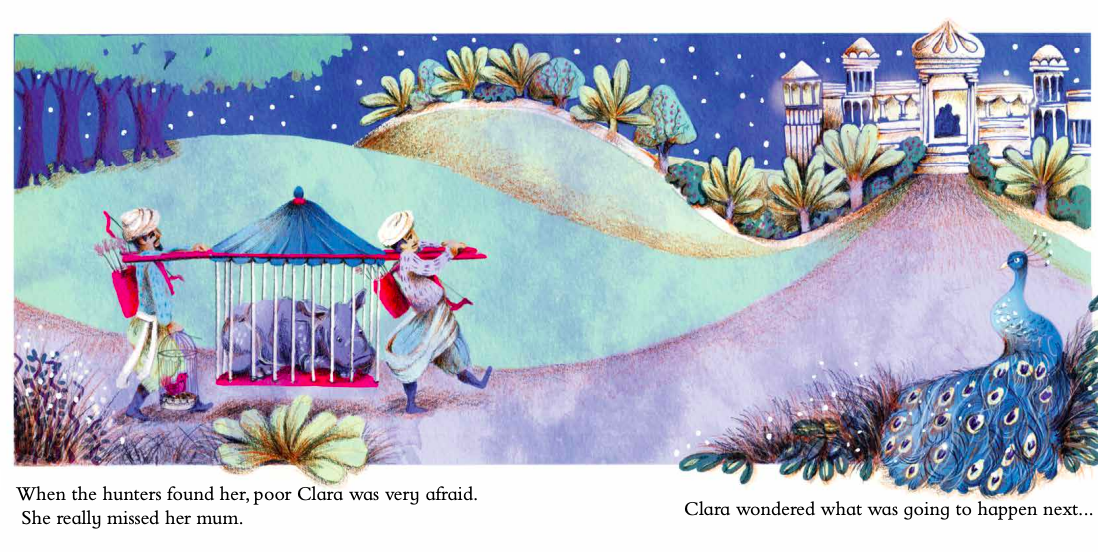
From ‘Clara’. In this spread where Clara is caught by hunters, the bird is also in a cage…
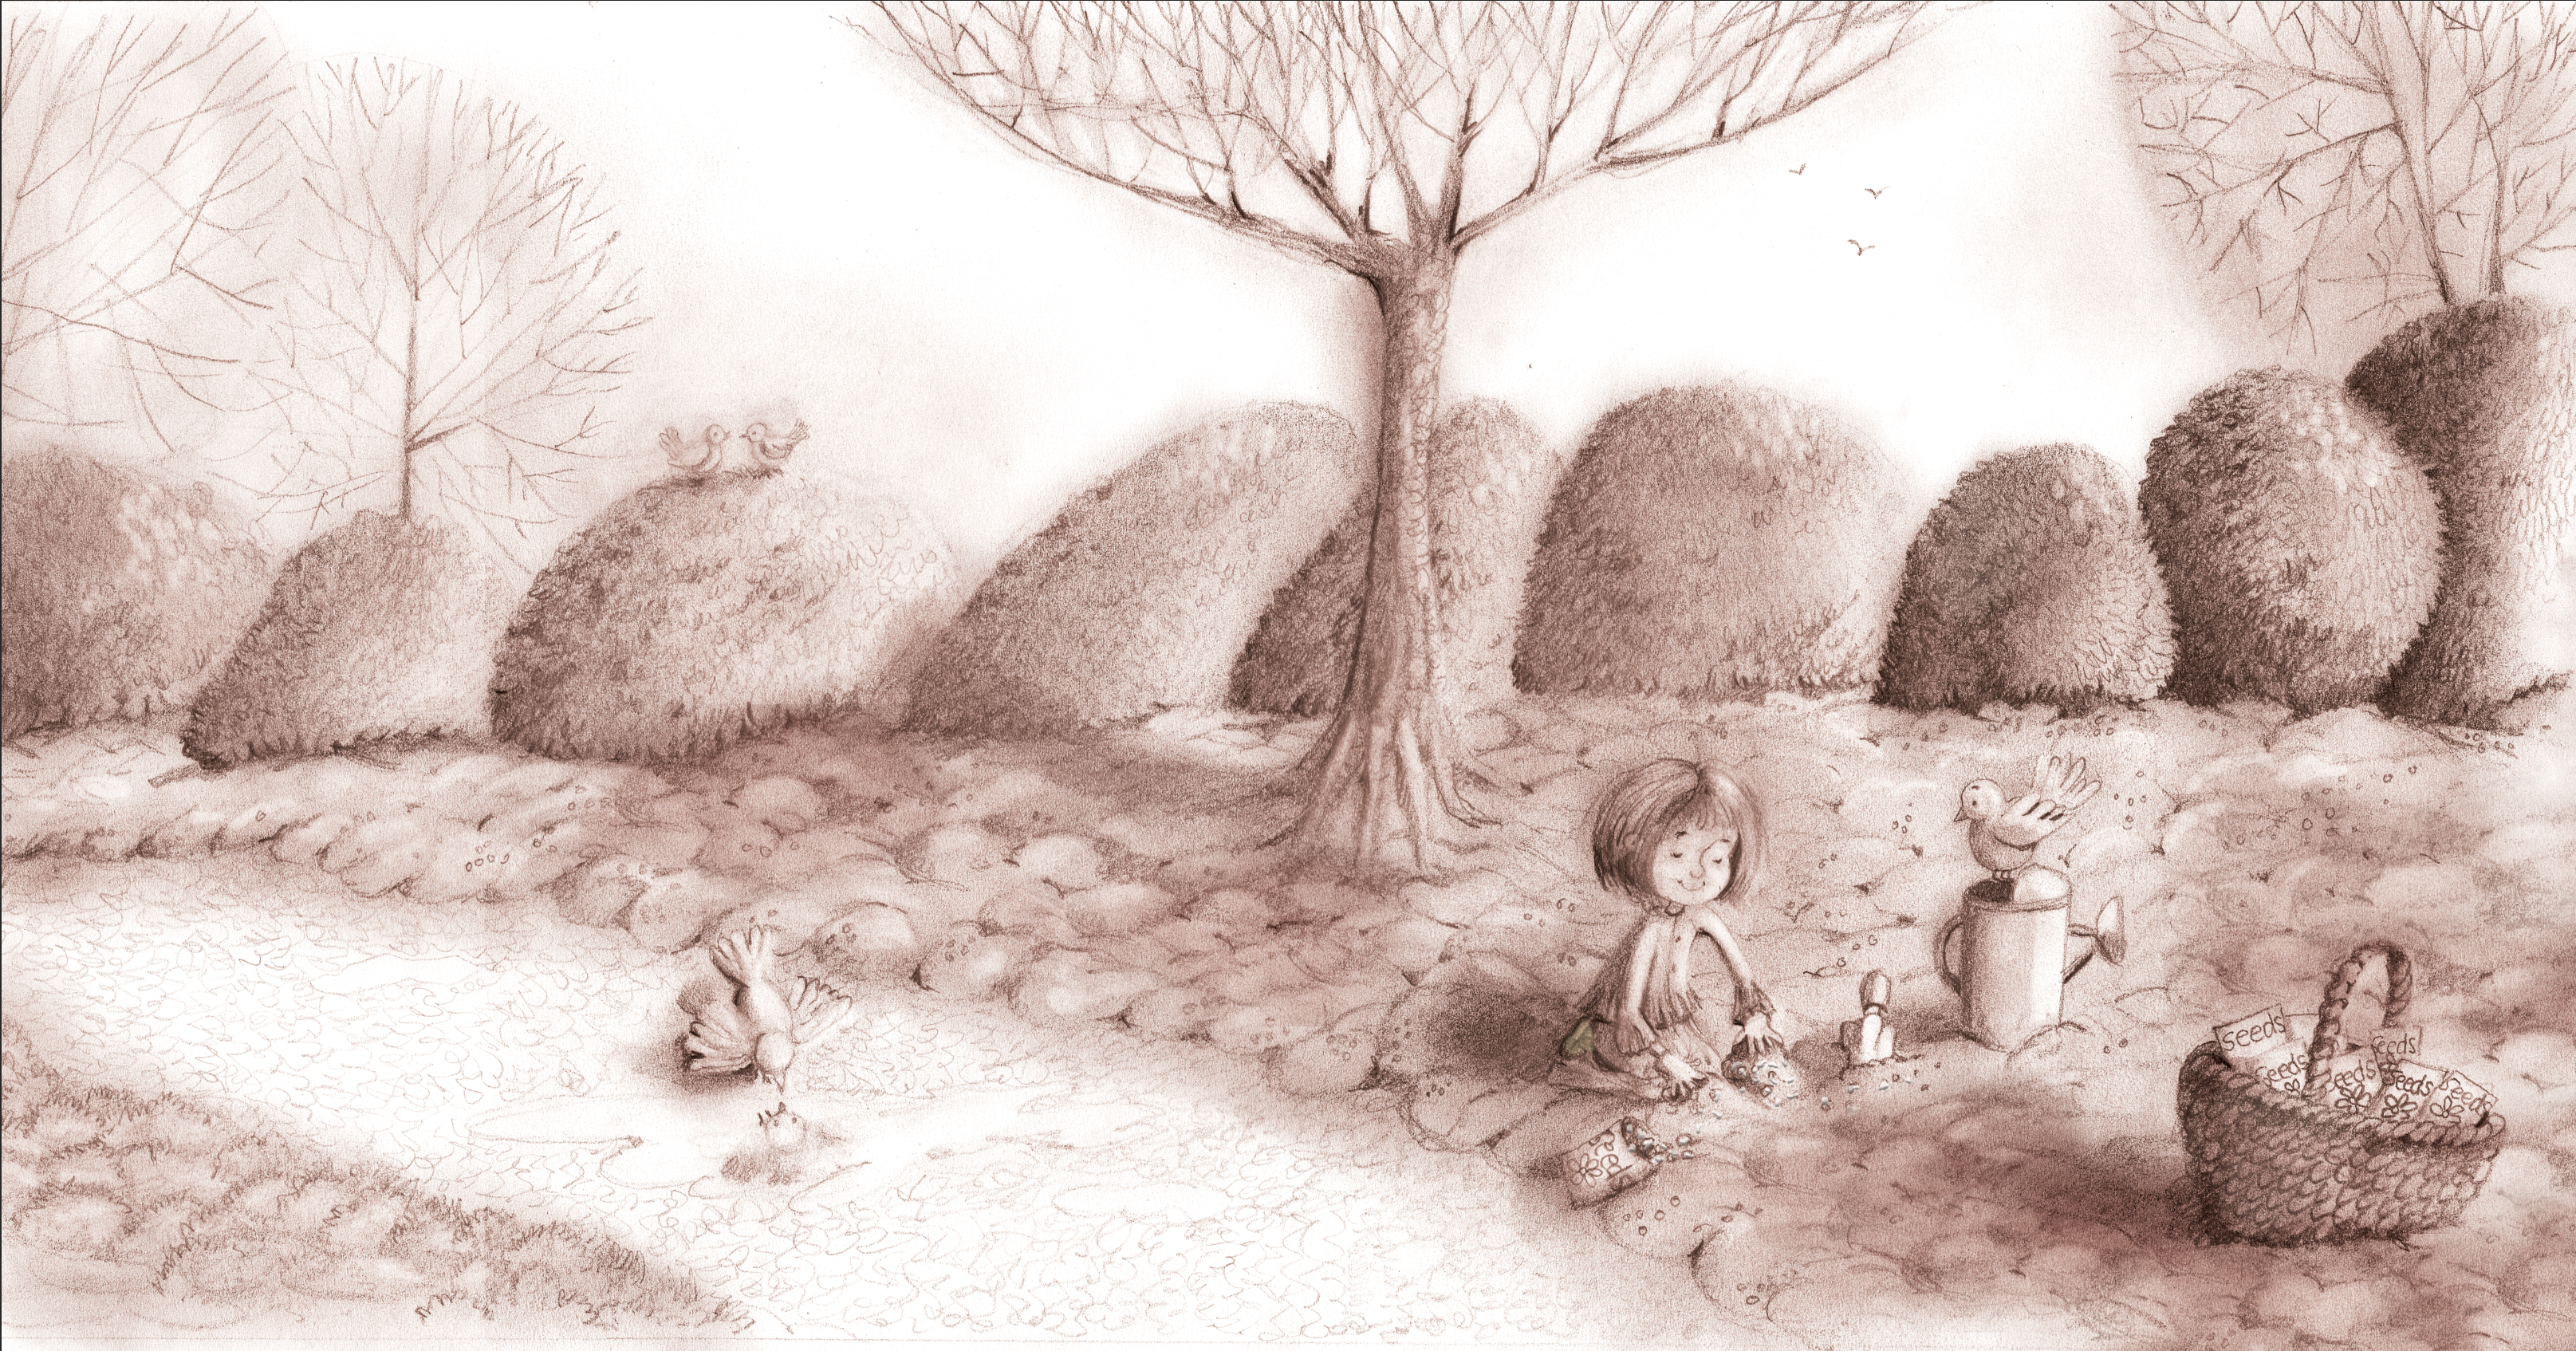
I like all my pictures to have a very traditional ‘hand drawn’ feel to them, even though a lot of the work is done digitally. As with most of my illustrations, the pictures for Anna’s Garden started with a black and white pencil sketch, at first drawn loosely and quickly to capture movement. Once I had something I was happy with, I traced the sketches using layout paper. I did this with every element and then assembled the final composition by tracing everything into one final drawing. For the illustrations in Anna’s Garden, I used a 5B pencil with a very sharp point onto layout paper which is brilliant white and smooth and really helps to give a clear image that will scan well. To bring softness to the pictures, I drew the outline lightly and smudged the edges. The breadth of tonal values of the soft pencil also helped to ensure dark areas could be very dark and the lights could be pale and gentle. When I was happy with the line drawing, I scanned the image at 600 dpi (if your scanner doesn’t do this, 300 dpi is fine - this is the minimum resolution you will need for print.) and saved as a jpeg.

Finished pencil drawing
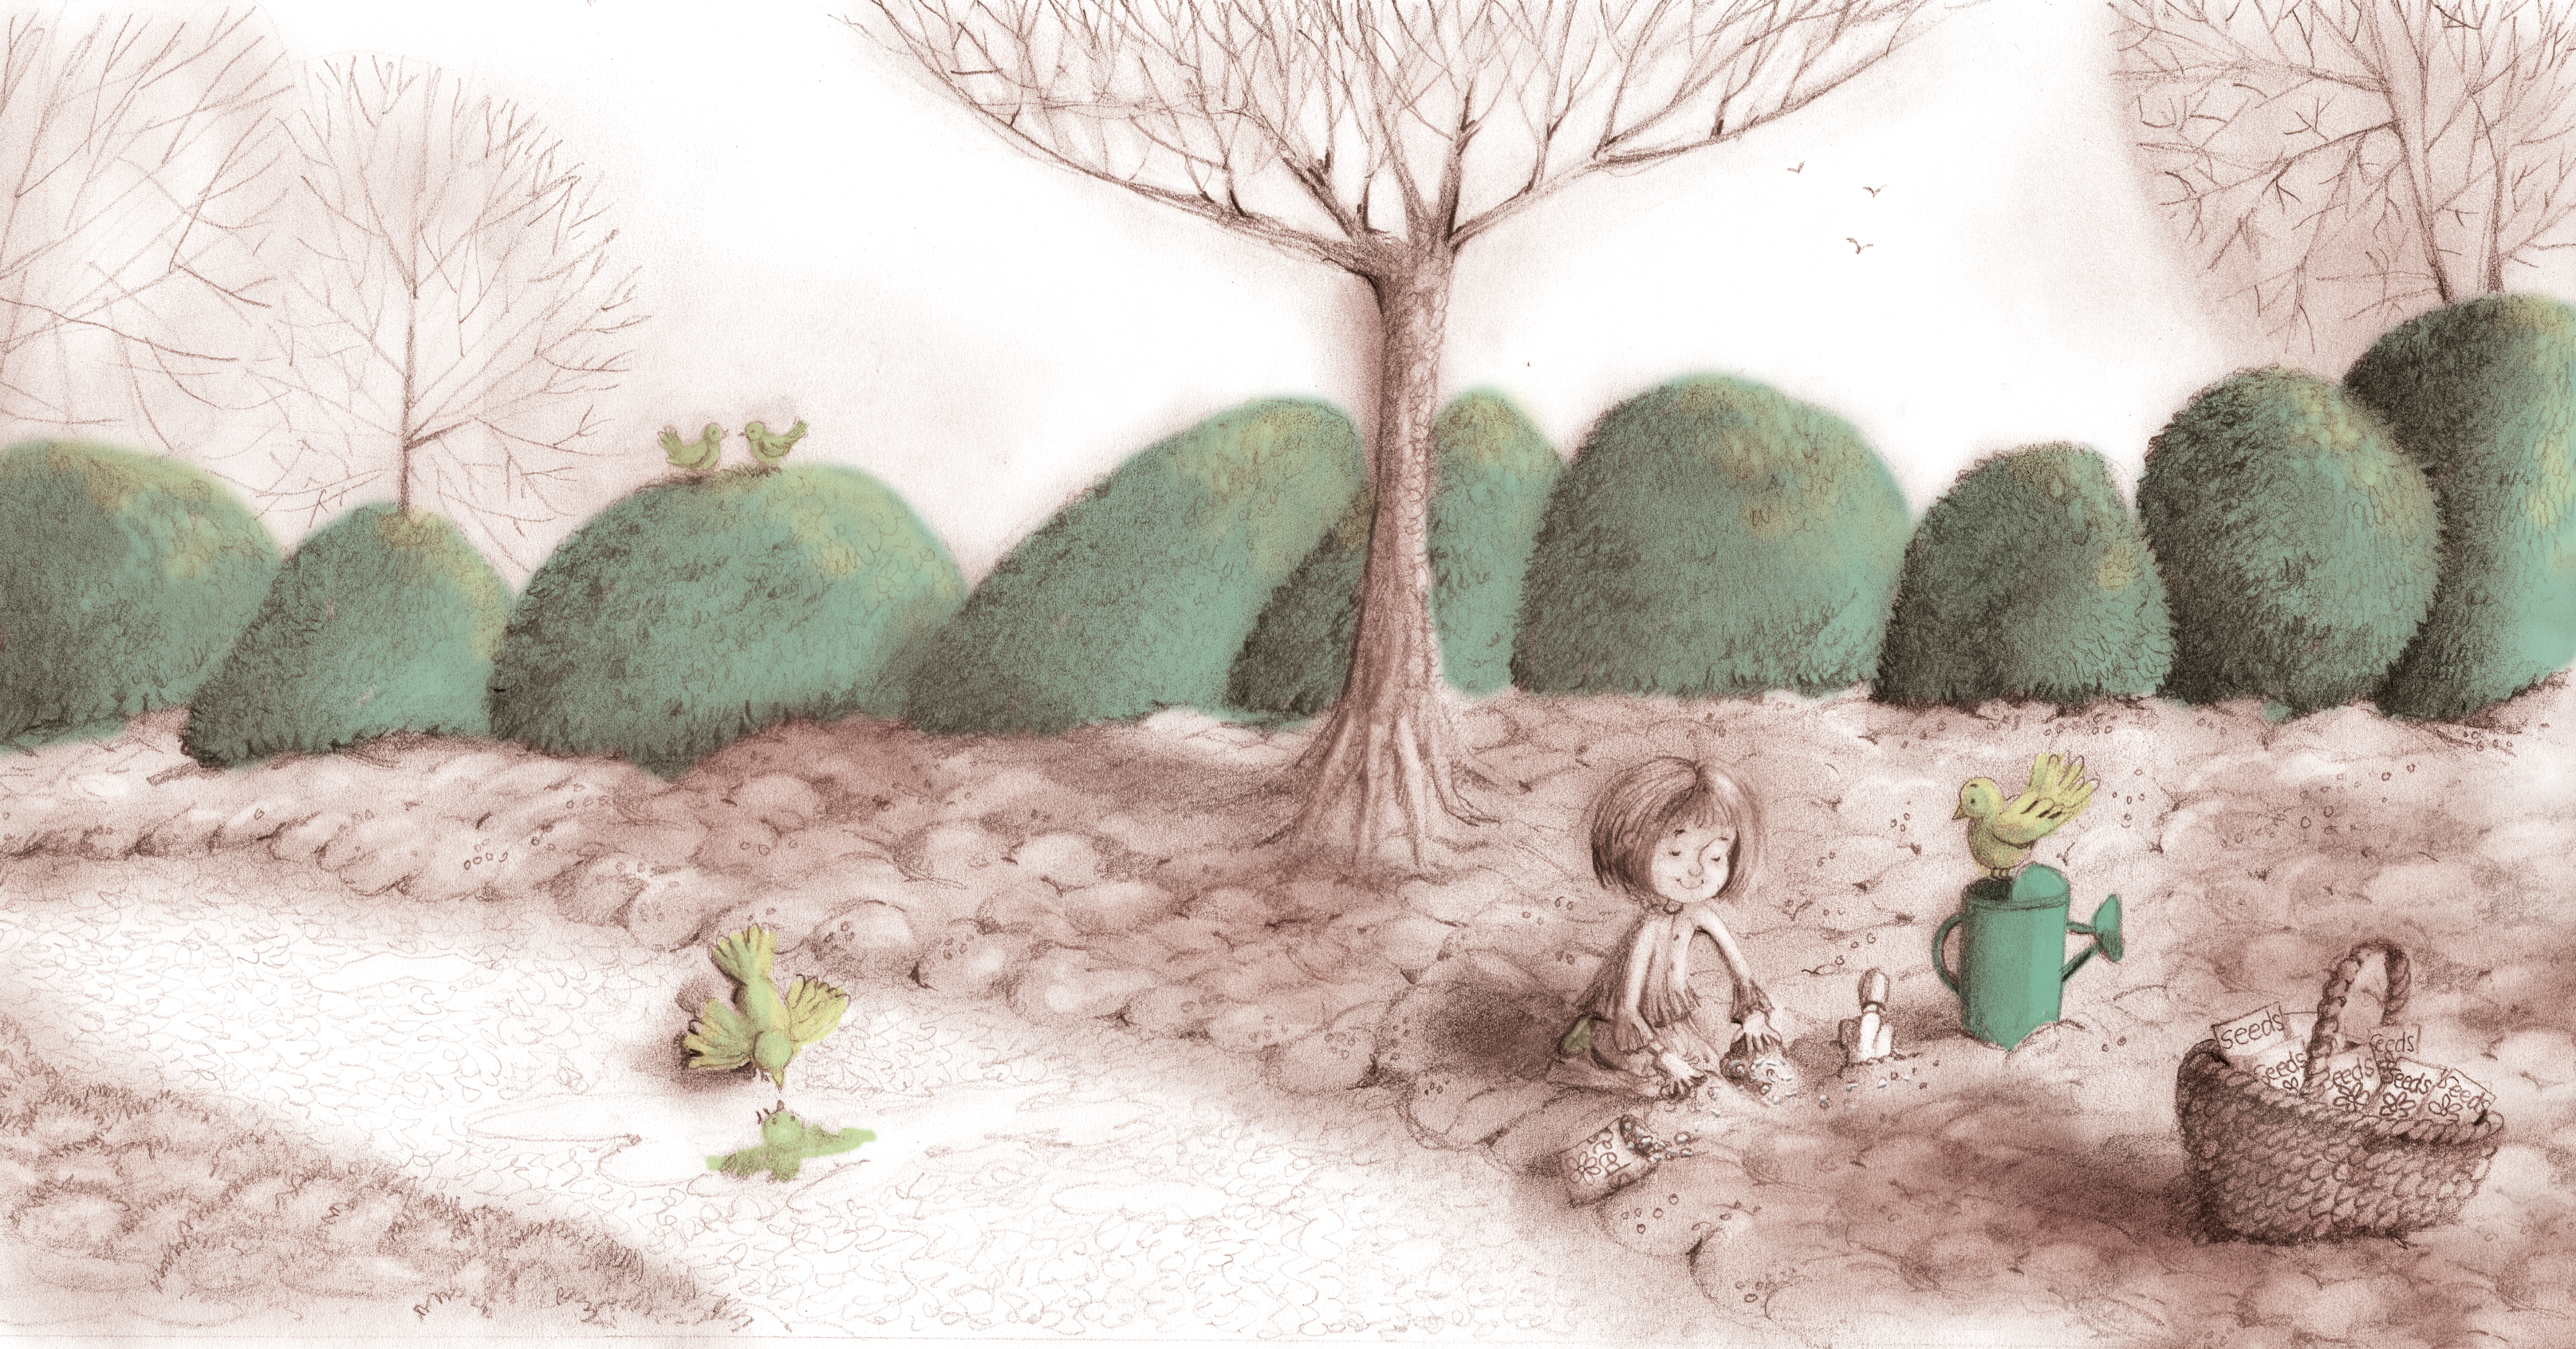
I brought the scanned drawing into Photoshop and cleaned it up with the eraser tool. I then made the lines darker by adjusting the contrast and multiplying the image. For the illustrations in Anna’s Garden, I also changed the outlines to brown which gave a warmth to the finished illustrations.
Finished drawing ready for colouring
Once I was happy with the line drawing, I started colouring which was done mainly in Photoshop. ‘Multiplying’ this layer made it transparent so that I could add colour underneath the drawing - this technique preserved the tonal values, shadows and details. Using a graphics tab and pen, I added colour to each element making sure each layer had its own name so that I could modify the colours easily.
Starting to add colour in Photoshop
I created a colour palette as I went along which I used throughout all of the illustrations in the book - this ensured that Anna’s dress for example, was always the right shade of turquoise, and kept a colour theme going throughout the book.

Digital colouring completed
To keep the traditional feel of the picture I painted the sky in watercolour (creating a special effect with sea salt dropped into the paint when wet). I then scanned this and added it as a new layer.
Watercolour sky added as a new layer
When I had coloured all of the picture, I added the finishing touches such as sunlight and highlights which really brought the picture to life:
Finished illustration with sunlight and highlights